Flying From Water
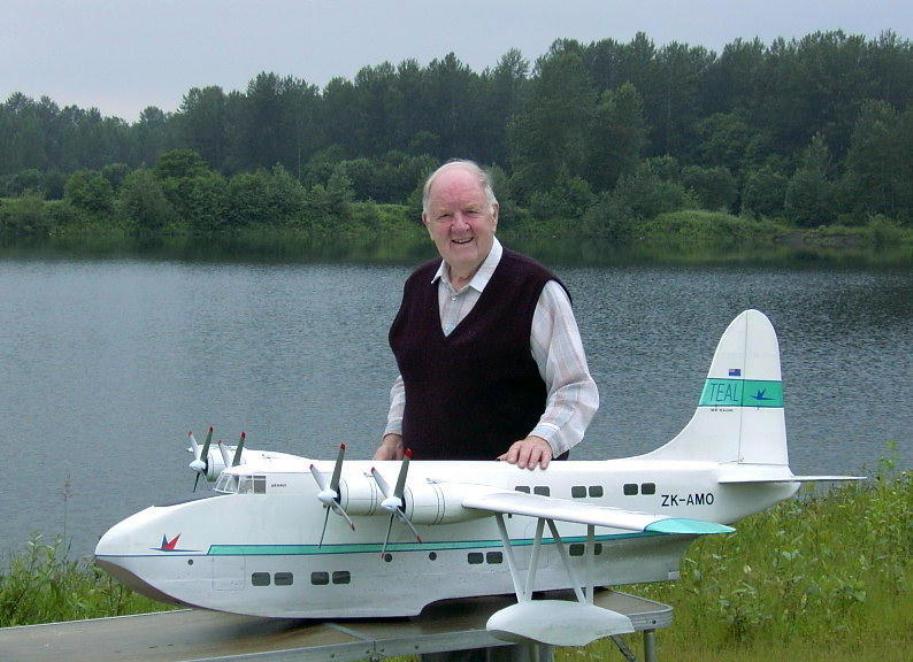
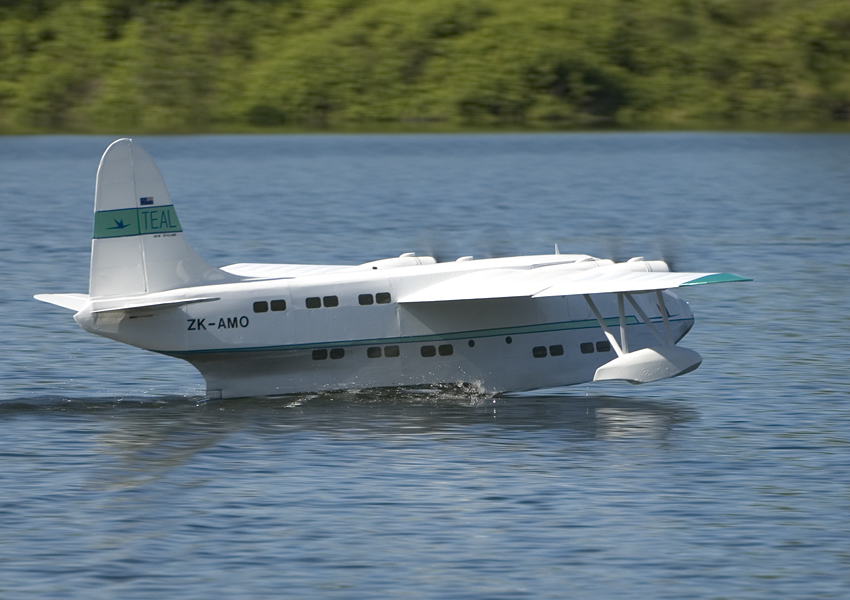
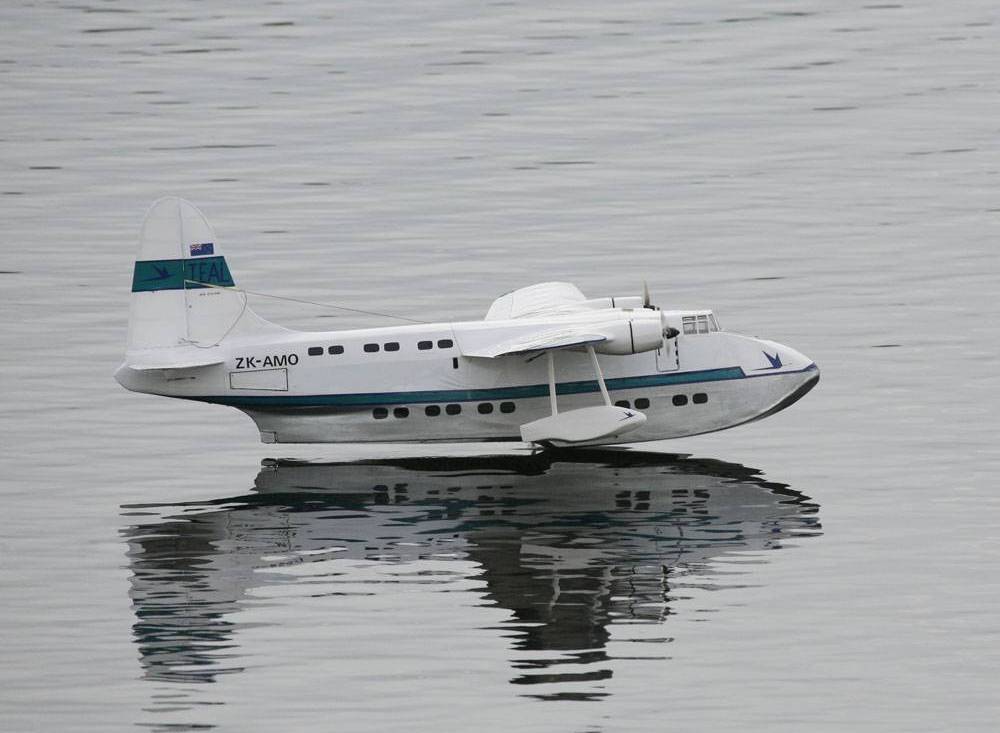
Ivan and his 100" Solent
What is different about flying off water? Which are better; flying boats or float planes?
Electric models are great for water flying and make models of multi engine flying boats a breeze. Gone are the days of gas flying when the engine cooled off while idling on the approach, then coughed out in the middle of the lake after landing. But with electric models, remember that the speed control/BEC has a cutoff point, so don’t fly until this point is reached. Land with enough “gas in the tank” as it were, to taxi to shore. Apart from this, batteries last longer if they are not regularly run down to the cutoff point.
Most model fliers who want to try flying off water get some floats and attach them to a well proven land plane, and that was the experience of this writer some years ago with gas models. Flying off water is a lot of fun.
In recent years some good ARF flying boats have become available, or land planes that come with both wheels and floats. These are usually built of foam, which has an advantage in water flying because of the flotation qualities. Should they turn over in the water, they do not sink, and they float high enough that the equipment is often not in the water. Although most model float planes seem to be of a high wing design, you will do well to consider a low wing float plane because when the wind comes up, the high wing float planes are the first to tip over when taxiing in any direction but directly into the wind.
If you are buying and fitting floats to an existing land plane, there are several basic rules that apply. The following points should be a guideline for this, or for evaluating an ARF that comes with floats. The nose of the floats should protrude in front of the nose of the plane by almost half the length of the propeller. The rear of the floats should be about midway between the trailing edge of the wing and leading edge of the stab. The step of the float should be aft of the Centre of Gravity, at about 45% of the chord of the wing, more correctly MAC.
A question is often asked about the contour of the bottom of the floats or the hull. Is it better to have a flat bottom, or should it be “V” shaped? A flat bottom is easier to build, but the best combination seems to be a sharp "V" at the nose of the hull, transitioning to a very shallow "V" at the step. Rear of the step it is usually a shallow "V." A flat bottom hull may plane very well on takeoff, but tends to skip if not landed smoothly. Flat bottoms actually have a lot going for them, but the “V” hull in full scale planes was developed to reduce the risk of damage when landing in rough water. The “V” hull cuts through the waves and the material used for the bottom of a “V” hull can be lighter than that used for a flat bottom. One advantage of the flat bottom hull on a model flying boat is that it is relatively easy to take off and land on grass. This is a consideration for modelers who don’t have a suitable water area nearby and want a flying boat that can be flown off the grass at their home field all year round as well as when they occasionally take a trip to the lake during the summer months.
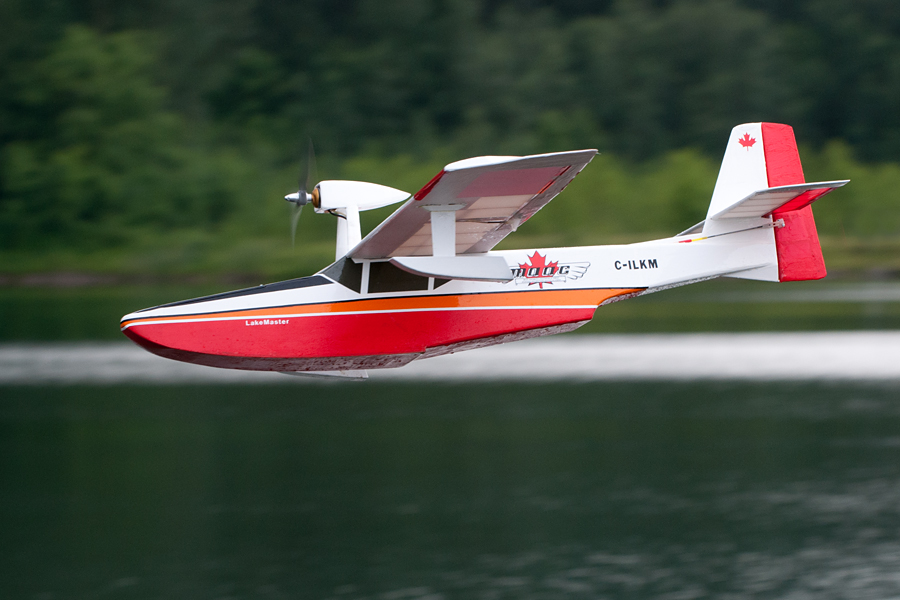
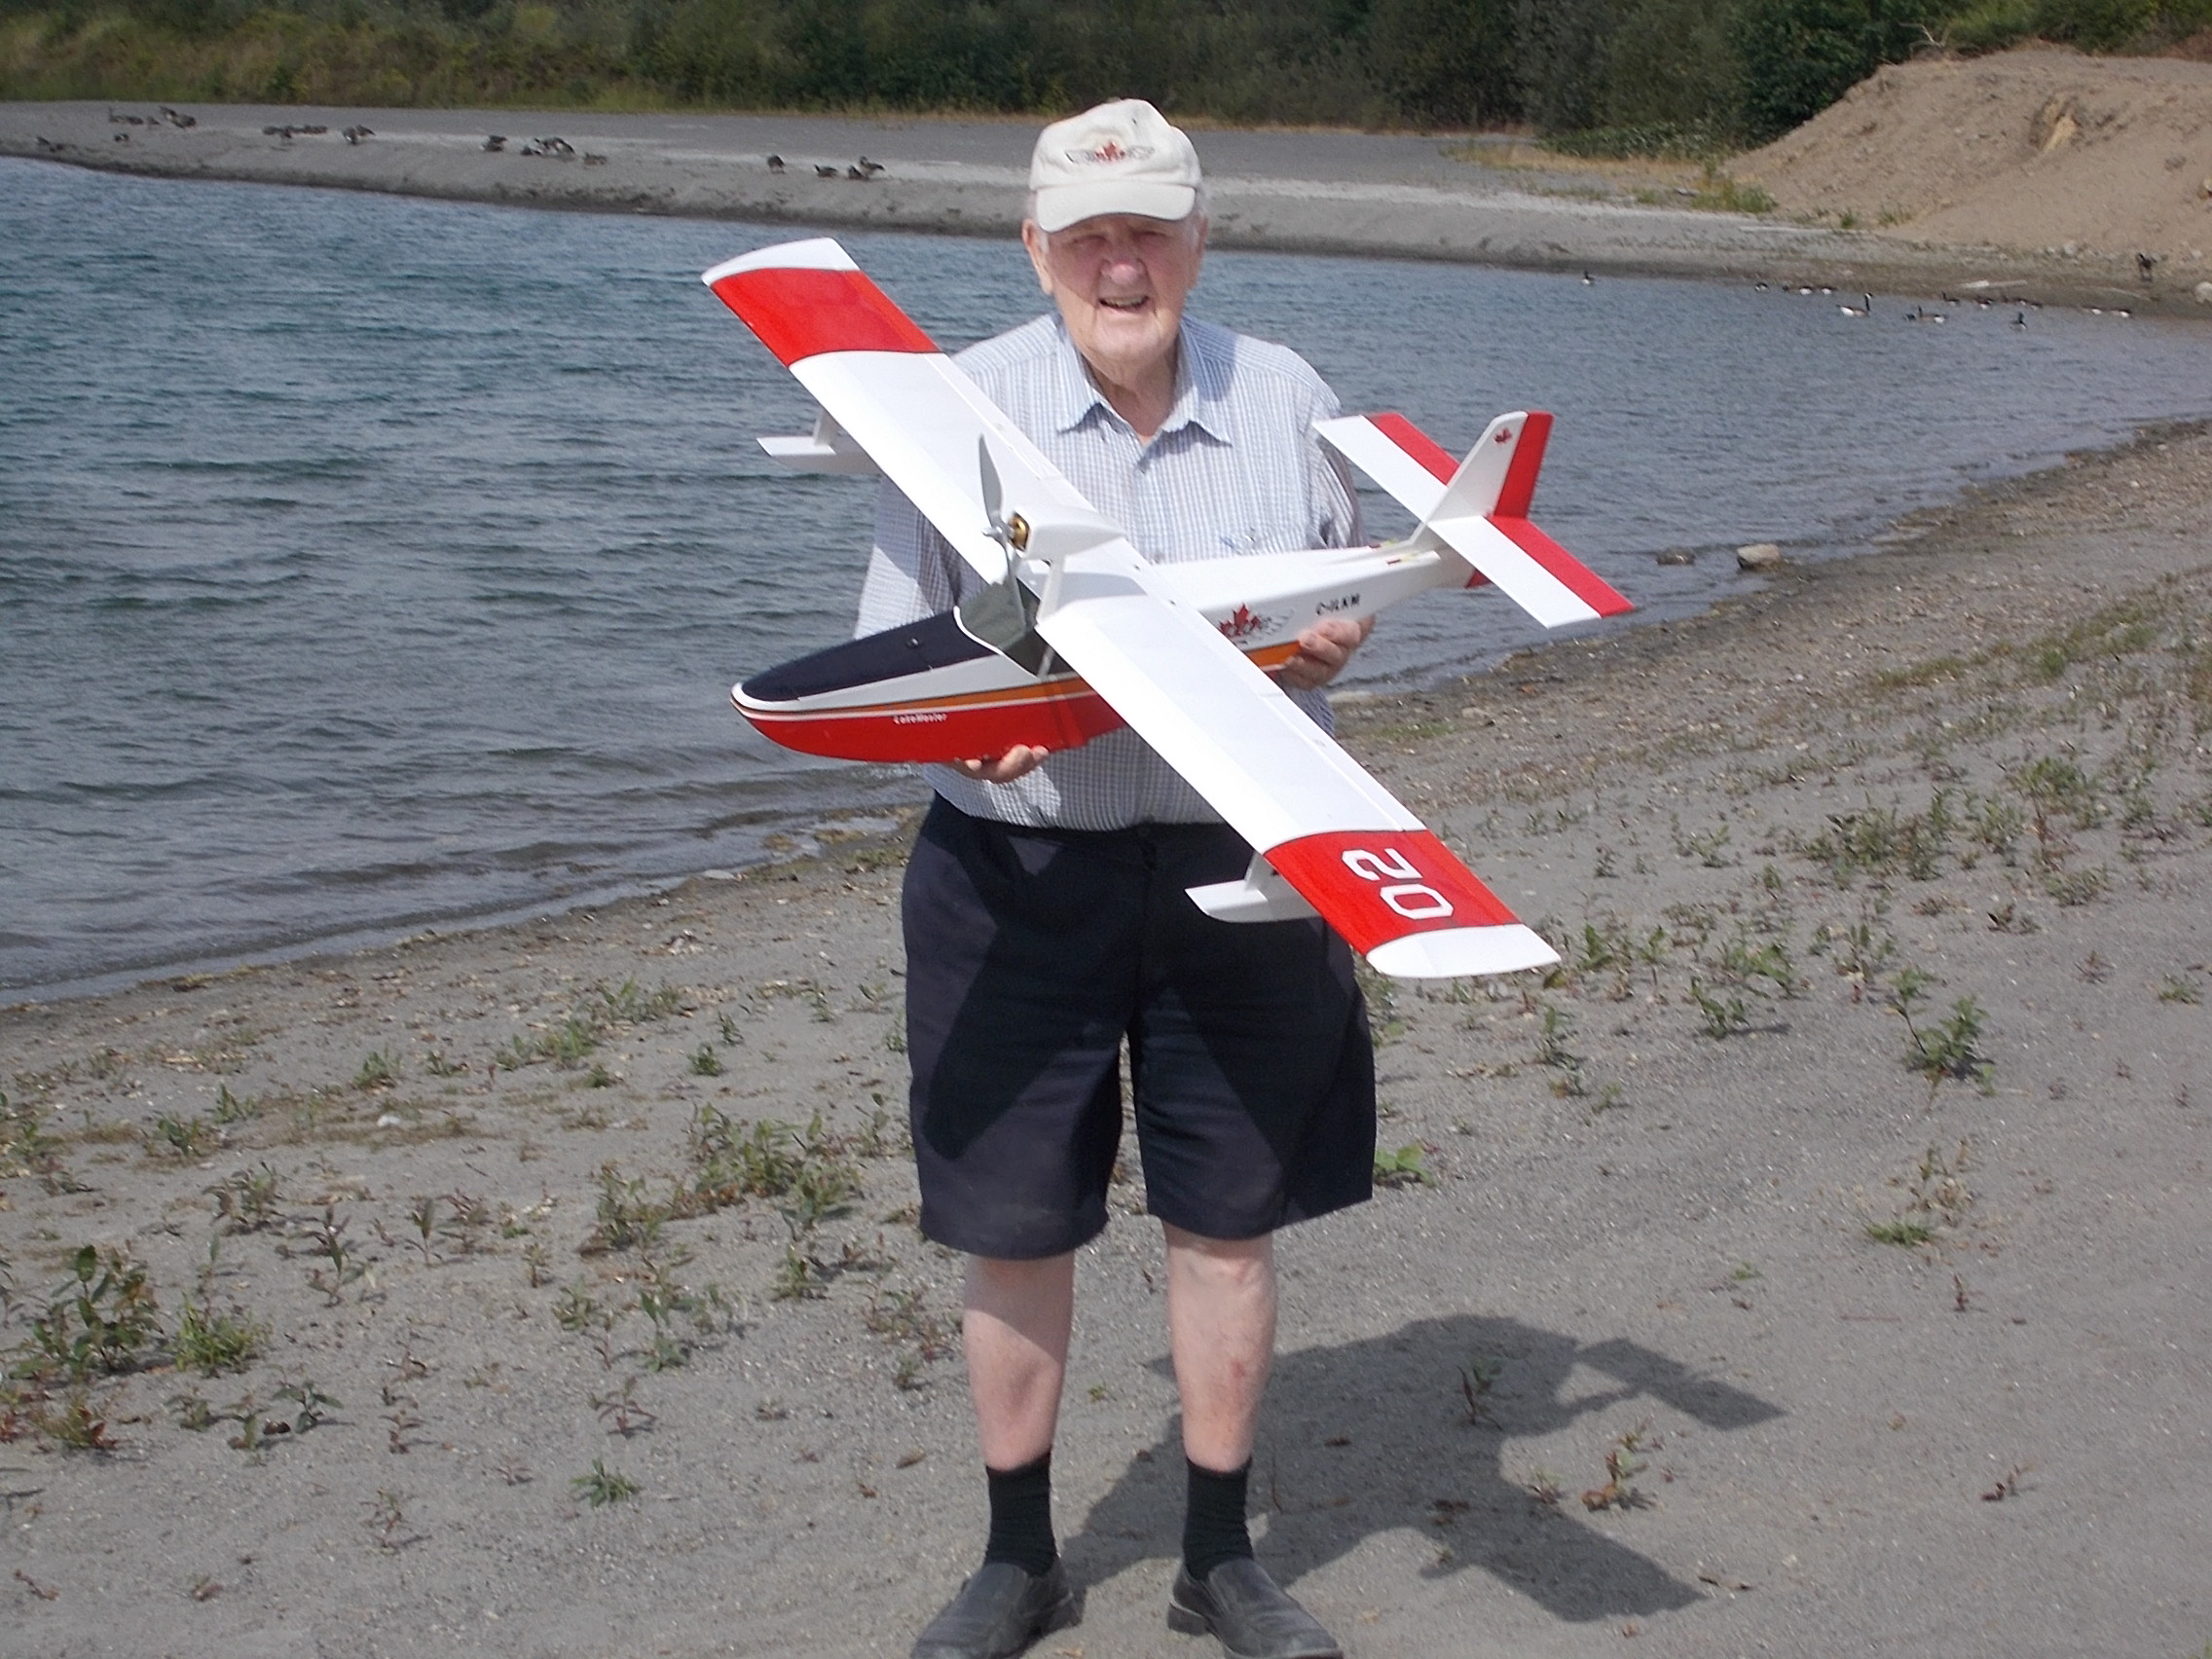
Ivan's LakeMaster with flat-bottom hull
Before going further, make sure you understand a few aeronautical terms such as datum line, incidence, angle of attack, dihedral, differential aileron. The reference point for measuring the incidence of the wing is the datum line of the fuselage. If you are not sure of this, you can take the datum line to be a line through (or parallel to) the horizontal stabilizer. Incidence of the wing is the angle between the chord line of the wing and datum line of the fuselage. In a flat bottom airfoil, the chord line is NOT the lower surface of the wing. Be sure to understand that the chord line is a straight line from the most forward point of the leading edge of the wing to the most rearward point of the trailing edge. In most so called flat bottom airfoils, the lower surface of the wing is only flat from the main spar to the trailing edge, but from the spar forward, it sweeps up slightly. The chord line is usually at least two degrees more than the flat surface rear of the spar. This angle of incidence is set and cannot be changed once the wing has been fitted to the fuselage. It is not to be confused with the angle of attack of the wing which varies greatly in flight, depending mostly on flying speed. That comes later.
Add to the above terms two new ones that apply to float planes and flying boats. They are “beam” and “keel flat.” The “beam” for a single hull flying boat is the width of the hull at its widest point, usually near the step. With float planes, the “beam” will be double the width of each float. The “keel flat” is considered to be the bottom surface of the hull or floats directly under the C of G. It is the area from directly under the leading edge of the wing to the step in the hull. When the model planes at high speed on the water just prior to lift-off, it is what we call “on the step,” and it planes on this small “keel flat” section of the floats or hull. If the model is blocked up on the work bench with the datum line of the fuselage parallel to the surface of the bench, the only part of the floats or hull touching the bench should be the tip of the step. The “keel flat” should angle upwards slightly at about 2 degrees, though sometimes it is zero with all of the keel flat touching the bench. Getting the “keel flat” setting correct for the floats is akin to checking the incidence for the wings. Forward of the leading edge of the wing, the keel gently sweeps up towards the nose.
When a model floatplane is at rest in the water, the pitch attitude it sits at is determined by the angle at which the floats have been attached to the fuselage. The model should float in a slightly nose up attitude. The importance of this will be covered later in the section about taking off.
When floats are added to a land plane, more side surface is added to the model forward of the C of G than aft. This can lead to some directional instability in flight. It is recommended that some additional fin area be added to correct this unbalance. This can be in the form of a sub fin under the tail of the model as used in many float planes, or small fins (usually four) attached to the upper and lower surfaces of the horizontal stabilizer about midway from the fuselage to the tip. Look at pictures of float planes to see these.
Some models fly better with the C of G a little further forward when flying with floats. In this case, add weight under the nose of the floats. It is the furthest forward point, is out of view, and will automatically be removed when the floats are taken off to reinstall the wheels.
FLOAT PLANE OR FLYING BOAT
So which is better, a float plane or a flying boat? A float plane where the fuselage is sitting up on two floats is probably easier to control during takeoff, but a flying boat where the lower section of the fuselage is shaped like the hull of a boat seems more forgiving when it comes to landing and taxiing in windy or choppy conditions. It is less prone to flipping over in rough water than a float plane. This applies particularly to turning around after landing into the wind. Flying boats are very safe in the water in windy conditions, but when a float plane turns out of wind, (especially light high wing models,) it doesn't take too much wind under a wing or the tail to turn it on its back. Because a flying boat has just a single hull, in needs floats attached under the wing out towards the wing tip. Instead of having tip floats like this, some flying boats have what are called a “sponsons.” They look like stubby lower wings at the level of the water line. In model flying these are not found to give sufficient buoyancy to keep a wing tip out of the water when taxiing crosswind, so are not usually as good as tip floats.
CHOICE OF FLYING SITE
Most float flying is on fresh water. There will likely be dunkings, but most electronics survive after a day or two of drying out. The speed control is the item that seems most prone to damage from water. Motors are seldom a problem. It is a good idea to run them as soon as possible after they get wet so the water is flung out. Salt water is not so kind and is not recommended.
If the shore line of a lake has a series of bays, it is best by far to fly from a point between the bays. The most favorable wind is one parallel to the shoreline. Imagine where you would place an airstrip so that there is open water ahead after takeoff, and also open water for the approach to land. This is not possible in a small bay with land both sides of you.
If the wind is coming across the lake so that it is blowing in your face as you stand on the shore, it is wonderful for taking off straight out into the lake, and will be good for blowing your model back to shore in the event of a mishap, but think ahead to how you are going to land. At many flying sites there are trees, people, vehicles or buildings near the shoreline and you must not fly over these. It you don’t have any of these obstacles, “Lucky You." For safety, all flying should be over open water. With this kind of wind, the experienced pilot may land cross wind parallel to the shore, but it is easier and safer to come along the shore line, losing height as if on base leg, then when getting low, turn out into the wind for the landing. Over land approaches are reserved for professional bush pilots, or crews flying water bombers that scoop water from isolated mountain lakes.
An offshore wind which is on your back as you face the lake is not good unless you take off and land well out in the lake and have a good boat. You must taxi a good distance out in the lake and take off towards the shore line. It is best not directly towards you, and it is necessary to make a climbing turn before reaching the shore line. The landing has to be almost towards you from across the lake. Again think of safety. In order to leave space for a go around should you come in too fast for landing, it is most important that you touch down well out in the lake. Flying in this wind is more prone to accidents, and while you are getting ready to go out to rescue the model, it will be drifting with the wind further from shore. A rubber dingy may take you out to rescue the model OK, but getting back to shore into the wind could be something else.
FLYING
The first thing to learn in float flying is how to taxi. Without a water rudder, it may be difficult to turn a model on the water, especially when wind is blowing. It always helps to hold the control stick right back so the elevator is fully up. Small blasts of throttle should blow enough air over the rudder to make the model turn. If the model will not turn in the desired direction, try doing a 270 degree turn in the opposite direction. With a water rudder, it still helps to keep the elevator raised while taxiing. It lowers the tail and puts the water rudder further into the water. This applies especially when the model is fitted with an extension of the rudder below the bottom of the fuselage that serves as a water rudder. The lower portion may not be in the water unless the elevator is up with the stick right back.
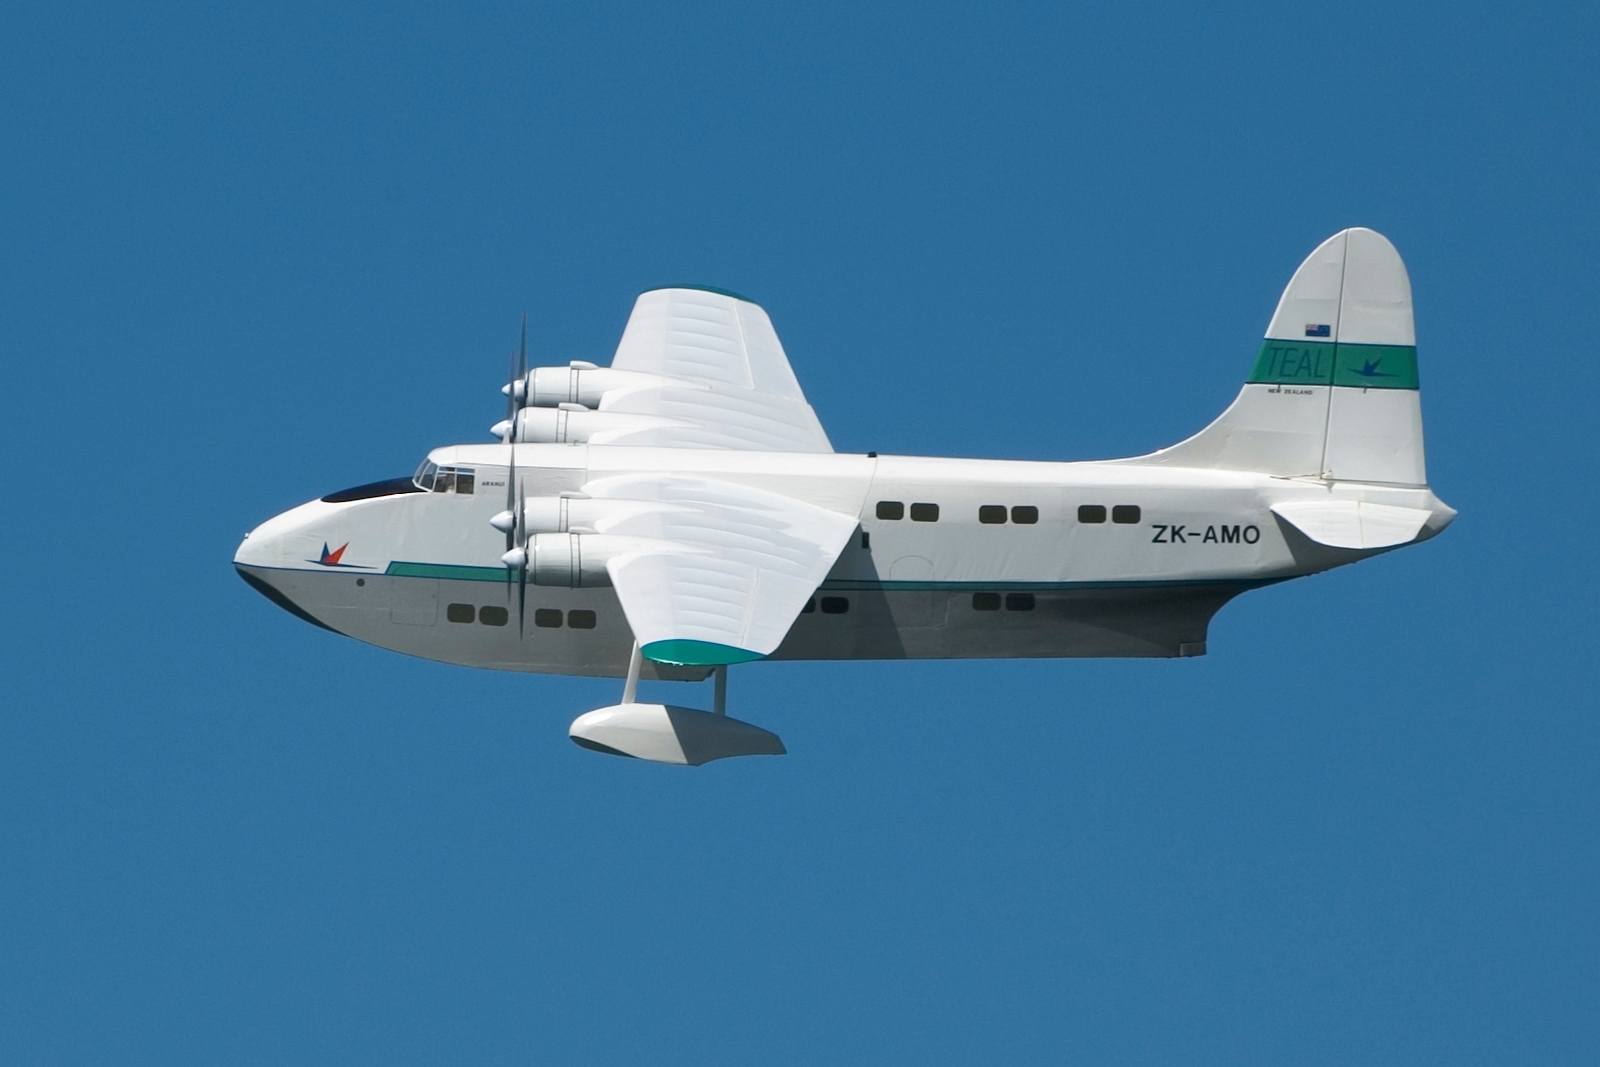
Cruise attitude
The next step is to take off, but before we get into that it is necessary to know the meaning of two terms relating to flight, ”attitude.” and “angle of attack,” We will be talking here about the attitude in relation to pitch. This one is easy. When the nose is pitched up as in a climb, the model is in a “nose up attitude”. When the nose is down as in a dive, the model is in a “nose down attitude.” When a plane is in level flight, it is called “cruise attitude.” Angle of attack is easy to understand in level flight. It is the small angle between the chord line of the wing and the direction of air flow which is a line parallel to the ground. The angle of attack might be 2 degrees in normal cruise at part throttle. At high speed the angle of attack is lower so as not to produce too much lift, and may even be negative for a flat bottom wing. On the other hand, if power is reduced a little so as to fly slower than the normal cruise speed, there will be a loss of lift if the wing stays at the same angle of attack. In order to stay at the same height, the lift is maintained by raising the nose slightly to increase the angle of attack to something like 5 degrees. This is called “slow cruise.” If we slow down more we will enter what is known as “slow flight.” In order to maintain height the nose has to be raised even further to increase the angle of attack to maybe 8 degrees.
As an aside, when a wing gets to a high angle of attack in slow flight, often referred to as being “behind the curve,” drag increases, and additional power is needed to keep the model from losing height. If the nose is raised further it will likely reach the stalling angle of attack of the wing when lift is lost and the model becomes uncontrollable. The stall does not come from lack of airspeed, but because of too much angle of attack. Our models are different from full scale planes in regard to stalling. The actual stall angle of attack depends on the design of the airfoil AND the size of the wing. In average models, it is about 11 degrees, whereas in full scale planes it can be 16 degrees or more. There are two phases in flight when it is necessary to understand angle of attack: the take off and the landing. If your Piper Cub model on wheels will not do a three point landing, think about this. Vintage full scale tail draggers were designed so that when they sat on three wheels, the angle of attack of the wing was at the stalling angle of about 16 degrees. In landing, pilots were taught to slow up just above the ground, and when the elevator reached the full up position, the wing reached its stalling angle, lost its lift, and the plane touched down gently on all three wheels at the lowest possible flying speed. A model of a tail dragger will stall at much less than 16 degrees long before it gets to the three point attitude, so therein lies the challenge of doing a three point landings with a model.
Let’s move on now to the take off.
TAKING OFF
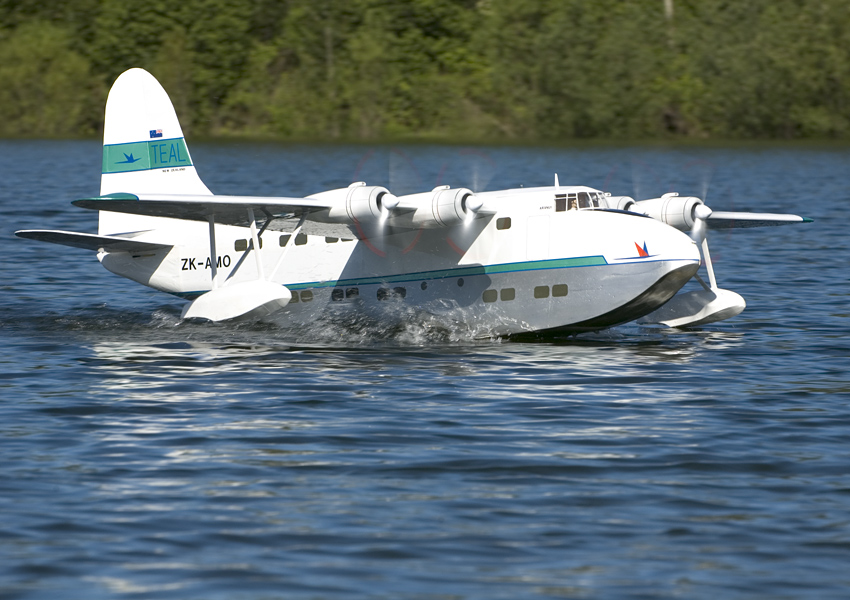
Getting "on the step"
At the start of the takeoff run, apply and hold full up elevator. Advance the throttle SLOWLY. With most electric models, full power in not necessary and may make for difficulties in control. The model will plow for a little with the nose very high and gradually rise in the water. This is “getting on the step.” Now reduce about half of the back pressure on the elevator stick. If some up elevator is not maintained, the model may swerve violently in what is known as a water loop. If it starts to do this, pull back on the elevator. Learn to observe how the bow line of the wave moves back from the nose of the floats towards the section we called the “keel-flat.” If the floats are set at the right angle, when the model planes on the step, the wings will be at a medium angle of attack, thus generating lift, and the model will gradually transition from being a boat to a flying machine. It will gracefully lift off when sufficient flying speed has been reached.
Take note of the attitude while on the step. The nose is pitched up very slightly and pilots call this “the sweet spot.” If it does not lift off easily, it may require back pressure on the elevator stick, or that extra bit of reserve power. If the nose is not pitched up slightly when the model is on the step, there will not be enough angle of attack on the wings to generate enough lift for takeoff. The model will continue to be a "marine vehicle." If more up elevator is applied than necessary, the nose may pitch up, thus putting the rear section of the floats into the water, creating drag and slowing the model.
Ready for lift-off
A model that is not in a slight nose up attitude when it planes on the water will possibly achieve a very high speed on the step and eventually become airborne only when it hits a wave big enough to throw it in the air. The speed will be so high that the model will of its own accord climb very abruptly, but it is not a graceful take off. A well designed float plane or flying boat will require very little more power to take off from water than from a paved runway. It is my experience that with a good float or hull design, it takes less power to get a model off water than off the average grass strip.
When a model float plane is on the step, it is still a boat, and the attitude (nose up or down) is determined by the angle at which the floats have been attached to the fuselage. To achieve the correct angle of attack while on the step, it may be necessary to adjust the length of the front or rear struts that attach the floats to the fuselage. When float tests are done on full scale planes like a typical Cessna, the trial flights are sometimes done with ground adjustable telescopic float struts. These are adjusted until the best strut length is determined.
It is in this regard that flying boats are very different. There is no way that we can adjust the length of the float struts to get the correct angle of attack on the wings while the model is on the step. It is done on the drawing board by getting the incidence of the wing correct in relation to the “keel-flat.”
Lift off!
Float planes are quite stable during takeoff because having two floats means that the wings stay level. But it is different in a flying boat with single hull and wing floats out under each wing. It is necessary to use ailerons to keep the wings level during takeoff so that one of the wing floats does not snag a wave and turn the model out of wind. The key to keeping the wings level during takeoff is good aileron design and having a wing with very little dihedral. A model with significant dihedral, whether float plane or flying boat, is extremely difficult to keep straight during takeoff. Any cross wind, or side gust, will lift the upwind wing and put more weight on the float on the downwind side of the model. This results in drag which turns the model out of wind. This is opposite to what is desired, and makes directional control impossible. Stay with models which have very little dihedral. This means that they should have ailerons, and these must have differential. The control throw on the up going aileron must be at least double that of the down going one.
After many years of flying gas powered float planes, my first model of a flying boat was in 1993 with an electric powered PBY-5 Catalina. It flew very well from a hand launch, or off land using a dolly. But the first attempt at flying off water was hopeless. In the process of getting on the step, the spray from the hull got into the propellers and slowed the motors just when the most power was needed. It was in the days of heavy nicad batteries and brush motors that were not very powerful. That is not often a problem now with light Li-Po batteries and powerful brushless motors. The spray was on account of the beam being too narrow and the hull too deep in the water. A major modification increasing the beam took care of that.
Now it was found that the model could not be kept straight while getting on the step. Naturally, one tip float or the other of a flying boat is always in the water prior to starting the takeoff run. The obvious thing to do is use aileron to lift the dragging float out of the water and level the wings. But "Surprise!" When aileron was applied to level the wings, the model always turned in the wrong direction, towards the dragging float instead of away from it. The model turned out of wind and was uncontrollable. It was determined that adverse yaw was the culprit. The down going aileron, instead of lifting that wing out of the water, was acting like an air brake, producing far more drag than it did lift, and the model turned in the wrong direction. Differential aileron was incorporated and things improved.
The next problem was that when the model got on the step, it was instantly in the air at a very low speed and often did a tip stall. The reason for the premature take off was excessive angle of attack. The published plan that the model was built from showed the incidence for the wing as used in the full scale Catalina. It was huge by model standards and when the model was on the step, the angle of attack was almost the stalling angle. The incidence was reduced considerably, and now the model would accelerate on the step to a safe lift off speed before becoming airborne. “Cheers!”
Some adequately powered models are able to take off from water in a very short distance. This is not the most scale like maneuver. When a flying boat planes while on the step, it is pretty to watch, and a takeoff at part throttle is more scale like than blasting off in a short distance.
LANDING
Landing can be very easy if done right. It is not necessary to line up with a narrow runway and land in a short distance. But don’t get so undisciplined that you let the model land anywhere in the lake that it wants to. You are the pilot in control. Be sure to land into wind, or if there is no wind, takeoff and land parallel to the shore line. Pick your landing path and stay with it. Close to shore is much easier for retrieval if something goes wrong. Don’t fly without a rescue boat AND someone to assist.
 Approach attitude
A good landing starts with a good approach. A fairly flat approach with a small amount of power left on right through the landing makes for an easy way to start. The approach speed should be considerably less than the cruise speed, more akin the slow cruise that was mentioned earlier. Start the approach by closing the throttle, then applying just a click or two of power. Do not let the nose drop so the model descends at high speed, but apply some back pressure on the elevator stick so the nose is only slightly down. This is where the elevator trim gets a good work out in full scale flying, but with models it is easier to just hold some back pressure on the elevator stick.
Learn to judge your speed on the approach by the attitude of the model. The flight path is now downhill, so when the few extra degrees of angle of attack are dialed in to compensate for the slower flight speed, the attitude of the model is only very slightly nose down, or even level as in cruise. If the nose is too low, the speed is too fast. Nose high, it is too slow. Those nose high approaches are only for the professionals who fly on to carrier decks at minimum air speed. Start the flare for landing a few feet above the water, and keep the model just above the surface, leaving the power on. Gradually raise the nose to keep in the air while the model slows until it is slightly nose up in the “sweet spot” attitude. Then stop moving the stick back further, hold your breath without moving, and the model will land beautifully every time. Be patient in the flare. This is not a short runway and we are not in a hurry to touch down. It is essential to land at a fairly slow speed with the model in that slightly nose up attitude so the point of the step is the first part of the hull to touch the water.
Perfect touchdown!
As the model slows up after touch down, it is very important to keep the elevator stick right back. Failure to keep the elevator fully up could result in a water loop. This also happens in full scale float planes and flying boats and usually has serious consequences. In wheel planes, when a plane goes out of control in a violent swerve at high speed during takeoff or landing, it is called a “ground loop.” In water planes we call it a “water loop.” In model flying it seems that I see more “water loops” than I do “ground loops.” They are more prone to happen when the water is smooth because there is no wind, and in these conditions the speed on the water during takeoff and landing is higher than when flying into a wind. Tail dragger pilots please note that we do not land on water at minimum speed in a full stall as done in three point landings. Landings like that are akin to a belly flop. The sudden splash and slowing up is hard on the hull and not pretty to watch.
"Touch and go's" are fun to do, but avoid quick "splash and go's." On a good "touch and go," let the model plane on the water for several seconds after touch down before adding power to accelerate and lift off again. It will teach you to do good landings. A "splash and go" is when the throttle is slammed open immediately on touchdown. The pilot is not learning anything about controlling the model while it is slowing down. Many landing accidents happen during the slowing down section of the landing, so it should be practiced on every touch and go, holding the elevator stick full back to keep the model going straight, thus avoiding that dreaded water loop. If the model has been slowed down sufficiently before landing, there is no danger of it ballooning into the air again after touch down because of having up elevator.
The most common problem I see in landing on water is the model coming in too fast and touching down too soon. The forward part of the hull or floats touches the water first. This should never happen and results in ballooning, sometimes ending in a huge bounce followed by a disastrous out of control dive into the water. Remember the “angle of attack thing.” Speed must be reduced until the nose is slightly up and the model has arrived at that “sweet spot.”
WIND
A good sailor learns to read the wind. The pilot flying off water must do the same. Generally speaking, the wind over open water is smoother than over land and the limiting factor for flying off water is not the wind but the size of the waves. In this regard, larger models handle the waves much better than small ones. It is the scale effect. Waves that would be gigantic to small model float planes are nothing to 10 foot span model flying boats and there are plenty of these around now for the scratch builder. They are very safe and easy to fly.
Wind gradient is what every flyer should study. The wind speed at the surface is much lower than at a height for instance of 50 feet. The most change in this gradual transition seems to be close to the surface, about the height where the flare is started prior to landing. This is why a model that is on approach to land in a stiff wind may suddenly lose lift and drop out of the air just as the flare starts. Because of the head wind on the approach, the ground speed can be very low, and when the model flies into the zone of air close to the surface where there is less wind, the airspeed suddenly drops and the wing loses lift. To prevent this happening, airspeed should be increased when approaching to land in a stiff wind. This is done by having the nose a little lower than normal for the approach, and adding a tad more power. It was mentioned earlier that the best approach for float planes is fairly flat, with some power applied. This is even more important when flying in windy conditions.
To summarize this attitude thing on approach, let me suggest four types of approach.
No 1. No Power. OK with a larger model that has a flat glide angle. Not recommended for a small light model unless the wind is light and the nose is kept down so as to keep up enough momentum to maintain airspeed through the flare and touch down.
No 2. No Wind. With a little power applied, most models can be flown fairly safely at an impressive slow approach speed by keeping the model in the cruise attitude. The nose is not lowered, but the model is descending because of the increased angle of attack at the lower airspeed. Only do this in calm conditions.
No 3. Light wind. Fly the recommended fairly flat powered approach with the nose down just slightly.
No 4. Stiff wind. Use a little more power and keep the nose a tad lower, flying closer to the water before starting to flare.
Now that you know all about wind gradient, you can figure out why your model zooms upwards at a great climb angle right after takeoff on a windy day. But with a heavy model you might have noticed in windy conditions that it sags when turned downwind. This leads to another trap for new flyers. Flying downwind on a windy day, prior to turning around to land into the wind, a model flying at normal cruise air speed will be flying at a very high ground speed. There is a tendency for some flyers to think they should slow up in this situation. “Wrong.” If power is reduced, the model starts to lose altitude, and if the nose is raised in order to maintain height, airspeed will drop. Next comes the turn around to make the approach to landing. Turning in rough air at low speed is a formula for the famous “stall, spin, crash, burn and die syndrome”. Remember to judge airspeed by attitude. If the nose is up in order to maintain height, airspeed is too slow. When this happens, add power, which will likely cause the nose to rise further, so at the same time it is necessary to push forward on the elevator stick to get the nose down to the cruise attitude. When the model gets too slow, both throttle and elevator stick have to be advanced a tad. Stick and throttle often have to move together. You might recall that when we start the descent from cruise, as the throttle is closed, the stick also has to come back a little.
FLAPS
Although the full scale PBY Catalina is a large flying boat, it is not fitted with flaps. Flaps are fitted to land planes because runways are limited in length, while flying boats usually fly from open water where takeoff or landing distance is not a problem. But there is more to it than that. When flaps are deployed, they have the effect of increasing the angle of incidence. Partial flap when taking off from water may help if the stall angle of attack of the wing is not exceeded while the model is on the step. Take care if using flaps on takeoff that the model is not getting into the air too quickly at a dangerously low airspeed.
When landing with flaps down, because there is more effective incidence, it means that the model may not pitch up enough before touch down to raise the nose sufficiently. Flaps usually make it more difficult to get the nose up to reach that “sweet spot.” When designing a flying boat, the challenge is to get the incidence right for both takeoff AND landing. More incidence (or flap) may be better for takeoff, but less is better for landing. So much so, that one company years ago built the prototype of a flying boat where the incidence could be changed in flight. The mechanism necessary was complex, expensive to build and heavy, so it never went into production. Besides making it more difficult to get the right landing attitude, flaps act as air brakes and slow the model down quickly during the flare. This gives the pilot less time to adjust the height of the model for a smooth touch down. Landing without flaps is like landing in slow motion. It makes it easier to do a good landing.
THRUST LINE
One more item to check is the thrust line of the motor. This depends on the placement of the motor. On single motor flying boats the motor is usually mounted above the wing on a pylon. With this arrangement, the thrust line of the motor is pulling forward at a considerable distance above the drag of the wing. In “Mechanics” this is known as a “couple.” The forward thrust pulling against the drag of the wing at a lower level causes the model to pitch downward in flight. If the flyer overcomes this in cruise by adding up trim to the elevator, when the throttle is closed for approaching to land, because of the up trim, the model pitches upwards instead of the nose dropping to the glide angle. To correct for this, a model with a pylon motor needs an excessive amount of up thrust. With this, the “up trim” is not needed, and when the throttle is closed, the nose drops accordingly. Model flying boats with a pylon motor are the most difficult type of model to trim because of this characteristic.
The flying boats with the best characteristics are models of multi engine flying boats where the engines are mounted in the wing. There is no pitch change with these because the thrust line is in the same plane as the wing. But they should still have a small amount of up thrust. The reason is that the full size flying boats are designed to have a considerable angle of attack when they are on the step taking off. But at cruise speed they fly in a slight nose down attitude so as to reduce the angle of attack. In this attitude, efficiency in terms of cruise speed is increased if the thrust line is parallel to the line of flight. Hence a little up thrust is added. Some modelers are so ingrained about down thrust in their first high wing trainer that they miss this when building a flying boat and wonder why their model with down thrust is difficult to get in the air. A small amount of up thrust works wonders. The added bonus is that prop wash is directed downward onto the horizontal stab, helping pitch the nose upward during takeoff, and suddenly the lazy flying boat is a great flyer.
COVERING MATERIAL
Films like Monokote, do not stand up to repeated use under water. They are alright above the water line. My preference for the hull is balsa sheeting sealed below the water line with old fashioned nitrate dope both inside and out. Then the hull is covered with silkspan (light weight tissue) applied with Nitrate dope. Nitrate dope may not be readily available now, but clear brushing lacquer does as well. It is just a little slower drying, taking about 30 minutes. For finishing, use color spray can Krylon or equivalent fast drying lacquer. Film covering is satisfactory down to a point just an inch or two above the water line.
If water gets into a wing or tail surface that is completely covered with film, (and it invariably will) it seems to take forever to dry out because film covering does not allow air to get in. It is often wise to cover the lower surface of the wing and horizontal tail surfaces with a covering like Litespan or CoverLite. These seem to allow the air to breath and thus dry out the wood.
An electric model has quite a bit of weight in the battery and motors. In the case of a bad crash, it is possible that there is not enough buoyancy in the model to keep it afloat until it is rescued. Some foam blocks in the fuselage and/or wing panels are like insurance. If it is there it is not likely needed, but don't be caught without it. The small plastic air sacks used in packing are an option.
The tail section of a model gets a lot of spray. Make sure there are no openings where water can get into the wooden frame work. It takes very little water in the tail, or even on the surface, to move the C of G back a little. If your model becomes difficult to land smoothly at the end of a long float flying session, check the C of G. You may get a surprise. It is likely time to move the battery forward a little.
If the bottom section of the rudder is used as a water rudder, it is wise to apply nitrate dope or clear lacquer to the framework before covering. This is not necessary in other parts of the airframe except the hull. In scratch building, it is not necessary to use a completely waterproof glue for all of the construction. There are models in our area built with regular carpenter glue that have been flying off water for 20 years without any problem providing that care is taken with the covering.
CONCLUSION
Ivan with his LakeMaster 400
I would like to acknowledge the help I have found in material published by Andy Lennon who passed away a few years ago well into his nineties. I am just a young 88. Andy wrote a book, “R/C Model Airplane Design” published by Motorbooks International in 1986, and one chapter was given to “Flying Boat Design.” The good news is that MODEL AIRPLANE NEWS published a series of articles by Andy in 1994, these being updated chapters from his book. The section on flying boat design was published in two parts in the Nov and Dec issues that year. I’m sure y’all still have those copies, so drag them out!
Good luck in this exciting department of model flying. Take a model with you next time you are camping at your favorite lake. Nothing beats flying off the smooth surface in the early hours of the morning, but keep it quiet! Go electric!
Ivan Pettigrew
Updated: June 2018